NavBAr

Showing posts with label tutorial. Show all posts

Tuesday, December 11, 2012

Handmade Christmas - Budget Anthropologie Pom Pom Garland!

12/ 17 EDIT: I just realized that Anthropologie currently has a pom pom garland in their shop! So this doubles as an edition for Budget Anthropologie! Yay for happy accidents! To make your garland more like the Anthropologie version, braid or crochet the chain you attach the pom poms to!

***

In preparing my Christmas decor this year, I am obsessed with pompoms! I originally wanted to created a felted wool garland like (this one at West Elm), but we are on a tight budget this year and I didn't have the money for the supplies nor to buy one from West Elm directly. So I settled on the next best thing... pom poms! They have the same feel that I was going for, but as I already had plenty of yarn lying around and a few spare hours to operate as a pom pom factory, they were completely free!

Supplies:
Cardboard, or your hands
Yarn
Sharp Scissors

How-To:

1. Find a small scrap of cardboard, wood, or wrap yarn around your hands or fingers depending on the size you are going for. 
2. Wrap until you have a thickly padded section of yarn.(Here I have wrapped several sections at once to save time!)
3. Cut yarn end, pull the wad of yarn off the cardboard or wherever you have it.
4. Using another piece of yarn securely double knot around the midsection of the yarn wad.
5. Cut open the loops on either side the tie.
6. Trim pom pom ends until it is full and fluffy looking, depending on the look you are going for.
7. Leave the tie ends long to attach to gifts, garlands, wreaths, etc!
8. MAKE MOREEE


PomPoms1

Here's what I did with mine:
  IMG_2488-001
I made a Garland for our tree, and I used the extra yarn trimmings and extra pom poms as snowy vase filler!


IMG_2585-001IMG_2587-001

IMG_2582-001


Thanks for reading!!


Thursday, July 26, 2012

Tutorial - DIY Stenciled Pillows


The quest for new pillows continues! I know I said in my previous post that I did not recommend painting for my Chevron Pillow - and it was true for that particular project.

However, today I'm going to show you how to use acrylic paint to stencil a scalloped design onto fabric for some more pillow cases! For this project again, I only put the pattern on the front, but you can do it on as much of the fabric as you like!

I chose to stencil this project. I tried to create a foam stamp too, as suggested by many blogs/Pinterest , but I just could not get it to work for me. It looked terrible and would not stamp evenly!

Materials:

Plastic sheeting of some kind: I used a plastic folder from some kind of file folder thing I had laying around. Other ideas include old projector sheets, actual stencil material (found at Michael's or other craft store) or any kind of flat piece of plastic. You may try other materials, but for me, plastic worked best.

Acrylic craft paint of your choice & container for it 
(I got my paint on sale at Michaels for 29 cents! One bottle was enough for 2 pillow cover fronts.)

Foam brushes (either cheapo kinds like I used here or stenciling specific ones with flat ends)

Paper /cardboard etc. to protect your work surface - your paint WILL bleed through the fabric!

Paper towels (for cleaning off stencil in between uses)

Masking or painters tape

Scissors

Iron


1. Cut your stencil. I used scissors to cut my stencil out. I was not super precise, I just traced a half circle from a bowl I had on my table and filled in the smaller circle by hand. As you can see I left plenty of space around it to block any extra paint from getting on the fabric.

2. Make sure you protect your work space if you don't want and paint to seep through. I used craft paper to cover my space and then taped my material down on top. Tape your material down! It keeps it from sliding  all over and allows for more precise placement of your stencil.

3. Begin! Figure out where you want to start (I began at the top and worked down) and carefully place your stencil. Carefully dab your foam brush into the stencil - dragging strokes may cause the stencil to move out of place! Acrylic paint dries super fast, so you don't need to worry a lot about messing up the previous part, but do be mindful of wet spots!

4. Wipe excess paint off both sides of the stencil after each use. Otherwise you risk stray globs messing up your fabric!

5. Repeat until you have covered your whole surface! 

6. Allow paint to dry fully (leave it alone for a few hours, touch up where needed.

7. Once completely dry, use a scrap cloth as a barrier between the fabric and your iron, and gently iron on low heat over all painted surfaces to set the paint into the fabric. I ironed without a cloth and got some burn marks!

8. Sew your pillow cover together! (Or whatever else you are making with this tutorial!) here's a tutorial for the basic envelope style pillow cover like I did at Texas Cottage Blog


Ta daaa!! Paul the Cat approved.

Enjoy and thanks for reading!!

Thursday, July 19, 2012

Tutorial - DIY Chevron Pillow

Chevron Pillow
Hello my dear, patient friends! I apologize for the long absence between posts, but I have been enjoying many weddings, travels, and general summer fun since you last heard from me. 

I also apologize that my first post back in a while does not have a fully detailed photo layout, I was working on this project at 11 pm last night and wasn't sure it would work, so I neglected to take in progress photos!

I have been itching for some bold, geometric print pillows to make over our couch, but having no fabric that matched my desires in my stash, I have been on the hunt for an alternative option. I found a 2- pack of zig-zag printed pillows for $20 at Marshalls, and at $10/pillow it wasn't a bad deal. However, we already have plenty of pillows and I was hesitant to buy more.

So I went on the hunt for a printed fabric to make covers instead, and wouldn't you know it, I COULD NOT FIND A SINGLE SCRAP! None of my usual haunts had anything resembling the pattern I had in mind! I couldn't believe it. So I weighed my other options. I could:

1. Go back and just buy the ones I found at Marshalls
2. Purchase fabric online (I found some at Fabric.com) 
3. Paint my own design onto plain fabric from my stash
4. Use iron on adhesive to create the design 

While I did not purchase the original pillows, I did go back and ponder it.
I Investigated purchasing fabric online, but it came out to costing almost as much as the original pillows, possibly more!

So my first DIY route was to mark off the design with tape and paint it. While it was not terrible, it was not great either...I had a lot of bleed under the tape lines and overall it was not very pretty close up. 
Verdict: I do not recommend.


Random dog-shaped cat toy. You're welcome.

FAIL!

My next, more successful attempt, was using iron on adhesive and fabric strips!

To make your own, here's what you need:


Iron, Ironing board

2 coordinating colors of fabric, one for the base of the pillow, one for the stripes
 (I used fabric left over from other projects, the gray is from my Cirrus Duvet!)

Scissors/ rotary cutter

Straight edge and/or 45 degree ruler

Sewing machine

(I had all these on hand already, so it made it a nearly free project for me- but with coupons at Michael's or another craft store you can acquire most of these relatively inexpensively. Aside from the sewing machine that is...)

My version!


1. Following the package's instructions, iron your stripe fabric onto the adhesive and then cut into even width strips. Make sure you have plenty to cover the pillow! I used one package and it got me through both pillows perfectly with 1-1.5 inch wide strips.

2. If you have never made a pillow cover before, you can find a tutorial for a simple cover  HERE. I just made a basic envelope style cover, but instead of using one continuous piece, I cut the front and back pieces separately and sewed it all together at the end (just cut off the "short sides" in the tutorial for the back!). You can use this tutorial to cover one continuous piece of fabric or just the front as I did!

3. To begin, I folded my base piece in half, removed the backing from one of my strips, and used a 45 degree ruler as a guide to lay one strip at a time and iron it down on high heat. 

I eyeballed the distance between each strip, but once I ironed a few down on one half, I unfolded the base fabric and worked on the other side, going back and forth forming V's until I finished the whole surface. 

NOTE: On the first pillow, I cut most of the centers on the 45 degree angle, but on the second pillow  I just overlapped the squared off edges at the center of the V and they stayed down a lot nicer than the angled bits!

4. Once you iron everything down, go back and sew along the edges of each strip as a reinforcement, then sew  all your pieces together (see this TUTORIAL; I used separately cut pieces, so if you do too, just pretend the "short sides" for the back are cut off in the tutorial! )!

 If  you're not satisfied and you'd like to clarify or see me do a basic pillow cover tutorial, just let me know in the comments! Thanks for reading and enjoy your pillows!!

(Since this was a word heavy post, please enjoy this photo of my cat!)


Monday, December 5, 2011

Handmade Christmas - Pinecone Garland


Today's issue of Handmade Christmas is brought to you by Pinecones! They may be sappy, but they're free!

I made this pinecone garland for next to nothing, and you can too! It's a great, cheap way to bring the outdoors into your home this Christmas season!

Thursday, December 1, 2011

Handmade Christmas - Budget Anthro Mason Jar Snowglobes

 Today's edition of Budget Anthropologie is brought to you by water-less Mason Jar Snowglobes!

Anthropologie's Snow Globes

These little guys are sweet as can be, but, having a number of empty glass jars floating around my house, I knew I could recreate a host of these for a fraction of the price!

Materials:
- Mason jars or empty food jars with lids: I used basically every empty jar in my apartment, from empty salsa containers, spaghetti sauce jars, a few mason jars, even emptied and cleaned wax candle mini jars with lids and a tiny hotel jelly jar.

- Fake snow! I got mine at Target for about $1.50, which was as cheap as I could find it. Other ideas include crumpling up bit of foam into tiny pieces, shredded paper bits, glitter etc. 

- Bottle brush mini trees, or other fake mini trees. I found a pack of 2 larger ones at the thrift store for $1.00, and I got a few packs of 7 or 8 bottle brush trees of varying sizes for $2.00 each at Michaels.

- Hot glue and hot glue gun, or adhesive of your choosing.


Monday, October 24, 2011

Project - Custom Magazine Files


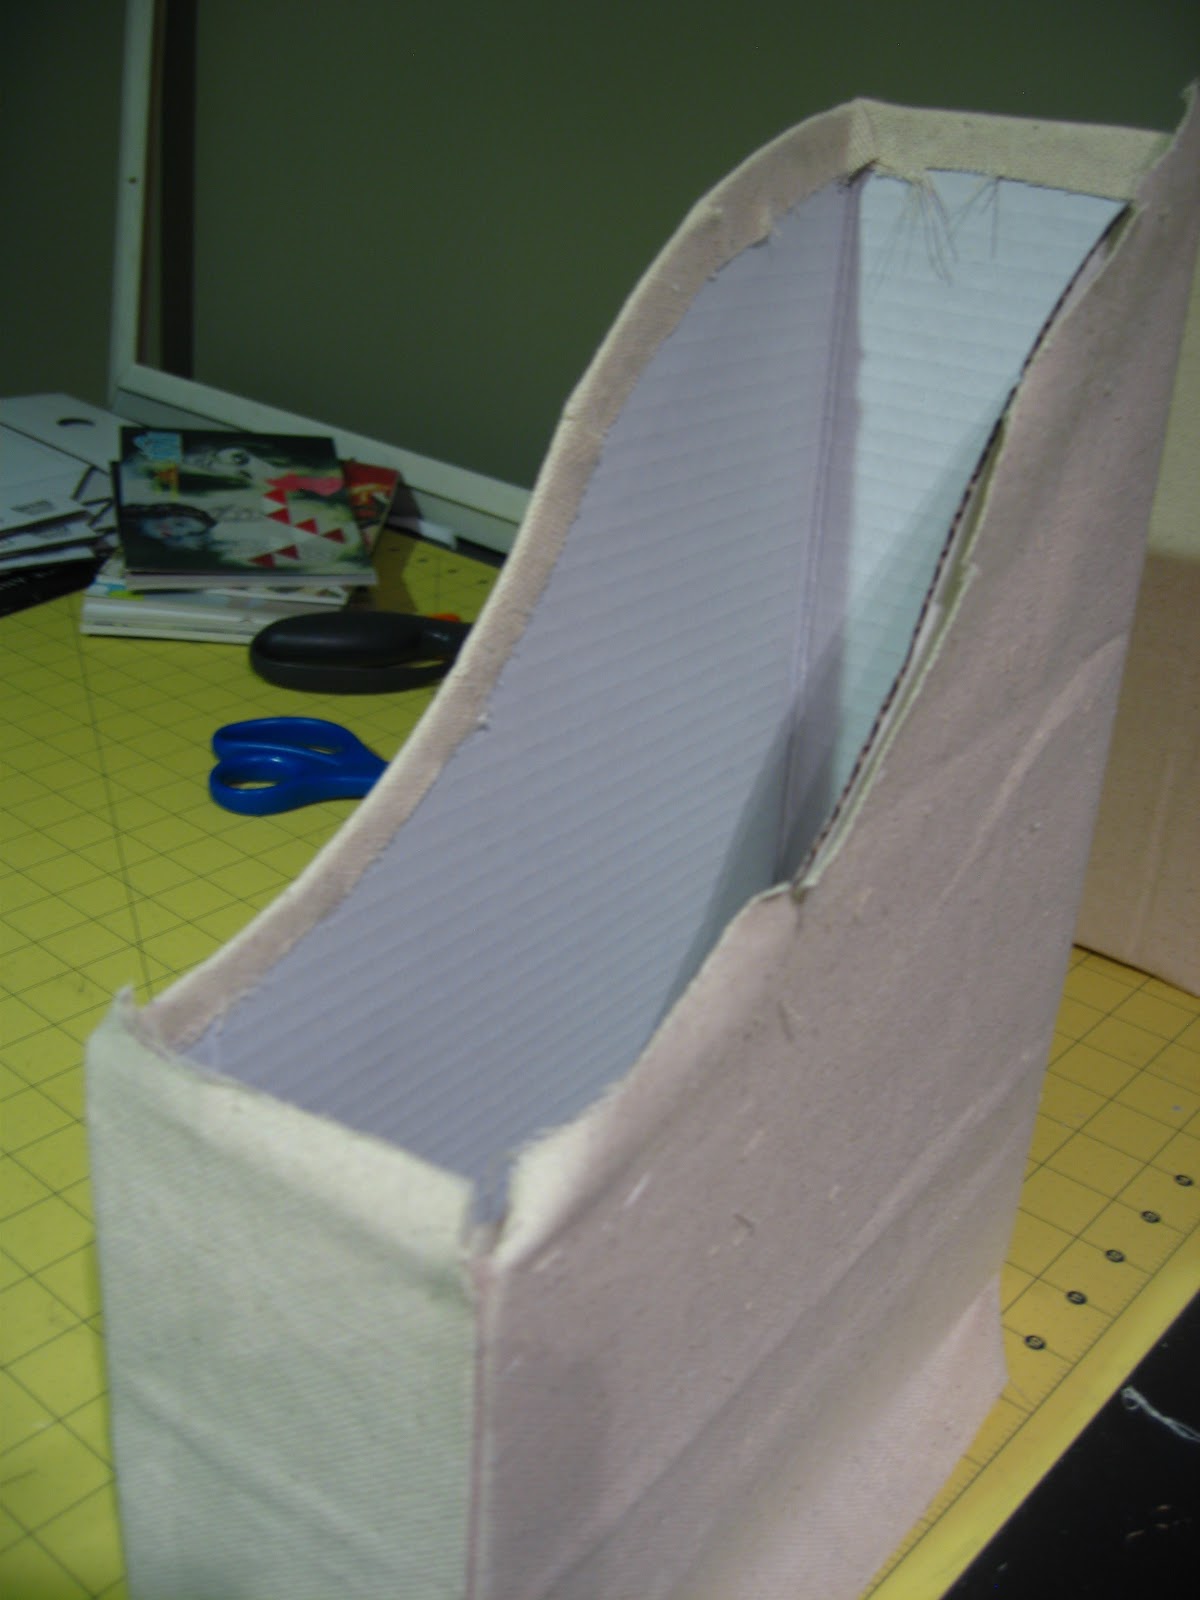
Using a 5 pack of cardboard Flyt magazine files from Ikea ($1.99), some leftover canvas from my wire basket project, and a little hot glue, I made some customized magazine organizers! I took a few cues from this tutorial over at Apartment Therapy, but for the most part, I made it up as I went.


First I carefully undid one of the files, and traced the outline onto kraft paper with about a 1/2 inch extra to fold over and glue down. On the curved edges, make short slices into the edges every 2 inches or so to get a clean curved edge when everything's glued down.


I grabbed my trusty hot glue gun, and started gluing with the top bit; then secured the front edge and worked back and forth, pulling the fabric tight as I glued all the edges down.


Ta daaaa! 5 lovely canvas covered magazine files for $2! Any fabric will work with this, and it's a super quick and easy way to get a customized look for your generic organizational dealios!


Organize yo' self!!

Thursday, August 18, 2011

What I Made Today: Mason Jar Soap Dispensers

I've despised our soap dispensers for ages. The cheap, "stainless steel" kind that rusts without a moment's hesitation,  drips soap out of the seal, and struggles to dispense properly. 
They're the bane of my hand and dish washing existence. So, I made some new ones!

Materials I Used:

2 small Mason jars with silver colored lids - $2.84 (I wanted silver colored and not brass ones like I usually find/ already have, as they matched the soap pumps I got better. Note to self: Really think about the color of the pump before you order and it doesn't match what you planned to make a dispenser out of!)
1 large pasta sauce Mason jar - Free (already had it after finishing the pasta sauce! I replaced the brass lid with a silver one from the little jar I bought.)

2 Soap pumps and threaded collars from One Dream Design - $10.50  (Plus shipping. I ordered new ones because the pumps on our already owned ones were terrible!)

Loctite 2 part 5 minute Epoxy - already owned (You can get this at any hardware/home improvement store,
 or use another permanent glue ie. Gorilla Glue.)


If you have access to a drill press, I reccomend using it. 
(EDIT: Forgot to mention that my charming and handsome husband, Kyle, used the drill press 
at his work to drill these for me! He's awesome :D )

However, a correctly used regular drill can get the job done.
Unless you have a bit specifically designed to cut a hole this size, I recommend starting with a smaller bit and 
working your way up to the size of part that goes into the top. (In this case, the white plastic bit on the pump.) 


BE SAFE! Wear eye protection, and clamp that sucker down!
 (Either with clamps or hands if you have someone to help you.)

Use a scrap block of wood underneath so you don't ruin your work surface.


Mix up your epoxy (or other glue) with a popsicle stick or some other disposable device. I used a lollipop stick.


This particular Epoxy is designed to set in 5 minutes 
(though I recommend letting it set up to 30 minutes to be really sure),
so if you are using this, move quickly because the mixture gets gummy within a few minutes. 

Glue the collar ring down over the drilled hole.
I suggest putting glue on both the ring and on the metal around the hole to get a good seal.


Let the Epoxy set for about 30 minutes. I know it's "5 Minute Epoxy" but trust me, I'm a professional. Not really, but I have used this stuff many times, so please try to resist the urge to mess with it until it is fully set!

Once it is dry and you can pick it up by the collar without anything falling off or sliding around, screw the pump on, and you've got yourself a brand new, totally awesome, mind blowingly fabulous mason jar soap dispenser!

Way to go! You did it!


Thanks for reading!

Budget Anthropologie Tutorial: Well Defined Lampshade

As promised in my previous Budget Anthro post, I put together my own version of Anthro's Well Defined Lampshade! (See it together with my DIY vintage book lamp base!)

Materials I used :

1 plain Lampshade - $5 
(I used a cheap one I already had from Target, but you can use any plain colored lampshade; one with bold prints may show through the pages when the lamp is lit.)

1 bottle of Mod Podge - approx $8 for 16 oz bottle 
(I recommend getting the weekly coupons from Michaels and using that to purchase a bottle if you don't already have one!)

1 Thrifted Dictionary -$2 
(You can use any old book, but I easily found a vintage dictionary at a local thrift store. You only need about 10-15 pages of a decent sized book. My book was a little over 9 x 11")


Scissors, Paint brush or Foam brush ( I switched to a foam brush after trying a large paint brush, it worked a lot better for me!) and Tray for Mod Podge (I used a Chinese food takeout container)

Project total: $15 (though I only spent an extra $2 since I already had mod podge and a lampshade.)


Keep in mind, Mod Podge can get messy so put something down to protect your work surface! I used some Kraft paper that came in a shipment box.


Cut your pages into strips, then into smaller rectangles, trimming the empty space around the text. You can cut as large or as small pieces as you would like, depending on the look you want. I tried to get close to the size used on the Anthro version, though I probably could have gone a little smaller.


Begin applying page pieces by first painting a layer of Mod Podge directly onto the lamp shade, then place pieces onto shade, and paint Mod Podge over the piece, smoothing out bubbles with your fingers and wrapping paper over edges of shade.


Repeat this process and continue to cover shade with book page pieces. I did 3 layers of pages, you can do as many as you want to get the look you want when the lamp is turned on. Fewer layers = more light coming through the shade. 

Let each layer dry before you do the next, and pay attention to pieces bubbling! Smooth them out gently with your fingers.

This is how the shade looks with 1 and 2 layers of pages respectively.


By the third layer your shade should look like this! 


Do a final top coat of Mod Podge to seal everything up, and you're done! Easy peezy lemon squeezy.


Enjoy your new lampshade, and thanks for reading! 


Whimsically Homemade


more pretties to enjoy

Related Posts Plugin for WordPress, Blogger...