| Chevron Pillow |
Hello my dear, patient friends! I apologize for the long absence between posts, but I have been enjoying many weddings, travels, and general summer fun since you last heard from me.
I also apologize that my first post back in a while does not have a fully detailed photo layout, I was working on this project at 11 pm last night and wasn't sure it would work, so I neglected to take in progress photos!
I have been itching for some bold, geometric print pillows to make over our couch, but having no fabric that matched my desires in my stash, I have been on the hunt for an alternative option. I found a 2- pack of zig-zag printed pillows for $20 at Marshalls, and at $10/pillow it wasn't a bad deal. However, we already have plenty of pillows and I was hesitant to buy more.
So I went on the hunt for a printed fabric to make covers instead, and wouldn't you know it, I COULD NOT FIND A SINGLE SCRAP! None of my usual haunts had anything resembling the pattern I had in mind! I couldn't believe it. So I weighed my other options. I could:
1. Go back and just buy the ones I found at Marshalls
2. Purchase fabric online (I found some at Fabric.com)
3. Paint my own design onto plain fabric from my stash
4. Use iron on adhesive to create the design
While I did not purchase the original pillows, I did go back and ponder it.
I Investigated purchasing fabric online, but it came out to costing almost as much as the original pillows, possibly more!
So my first DIY route was to mark off the design with tape and paint it. While it was not terrible, it was not great either...I had a lot of bleed under the tape lines and overall it was not very pretty close up.
Verdict: I do not recommend.
Random dog-shaped cat toy. You're welcome.
FAIL!
My next, more successful attempt, was using iron on adhesive and fabric strips!
To make your own, here's what you need:
Iron, Ironing board
2 coordinating colors of fabric, one for the base of the pillow, one for the stripes
(I used fabric left over from other projects, the gray is from my Cirrus Duvet!)
Scissors/ rotary cutter
Straight edge and/or 45 degree ruler
Sewing machine
(I had all these on hand already, so it made it a nearly free project for me- but with coupons at Michael's or another craft store you can acquire most of these relatively inexpensively. Aside from the sewing machine that is...)
 |
| My version! |
1. Following the package's instructions, iron your stripe fabric onto the adhesive and then cut into even width strips. Make sure you have plenty to cover the pillow! I used one package and it got me through both pillows perfectly with 1-1.5 inch wide strips.
2. If you have never made a pillow cover before, you can find a tutorial for a simple cover HERE. I just made a basic envelope style cover, but instead of using one continuous piece, I cut the front and back pieces separately and sewed it all together at the end (just cut off the "short sides" in the tutorial for the back!). You can use this tutorial to cover one continuous piece of fabric or just the front as I did!
3. To begin, I folded my base piece in half, removed the backing from one of my strips, and used a 45 degree ruler as a guide to lay one strip at a time and iron it down on high heat.
I eyeballed the distance between each strip, but once I ironed a few down on one half, I unfolded the base fabric and worked on the other side, going back and forth forming V's until I finished the whole surface.
NOTE: On the first pillow, I cut most of the centers on the 45 degree angle, but on the second pillow I just overlapped the squared off edges at the center of the V and they stayed down a lot nicer than the angled bits!
4. Once you iron everything down, go back and sew along the edges of each strip as a reinforcement, then sew all your pieces together (see this TUTORIAL; I used separately cut pieces, so if you do too, just pretend the "short sides" for the back are cut off in the tutorial! )!
If you're not satisfied and you'd like to clarify or see me do a basic pillow cover tutorial, just let me know in the comments! Thanks for reading and enjoy your pillows!!
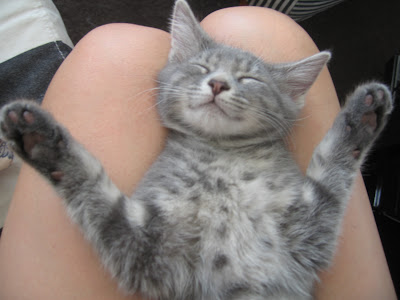
(Since this was a word heavy post, please enjoy this photo of my cat!)


No comments:
Post a Comment
I love to hear from you! Please keep comments on topic and respectful!